
18 October 2026
How to Glue Acrylic Sheet: A Professional Guide
How to Glue Acrylic Sheet: A Professional Guide
Learning how to glue acrylic sheet correctly is the key to achieving professional, seamless results for your projects. Unlike wood or paper, you can’t just use any standard adhesive. The strongest and most visually appealing bond is created through a process called solvent welding, which chemically fuses the pieces together. This guide will walk you through the entire process, from choosing the right adhesive to troubleshooting common issues, ensuring your finished product is strong, clear, and expertly made.
Understanding Acrylic Adhesives: Solvent vs. Polymerisable
The first step is selecting the right type of “glue.” For acrylic, these are typically called cements, and they fall into two main categories.
Solvent Cements
Solvent cements are the most common choice for joining Acrylic Sheet (Perspex). These are very thin, water-like liquids that work by softening the surfaces of the acrylic. When the two softened surfaces are pressed together, the polymer chains from each piece intermingle. As the solvent evaporates, the acrylic re-hardens, leaving a single, continuous piece of plastic. This creates a strong, transparent bond that is often as strong as the material itself. This process, known as capillary action, is perfect for tight, perfectly-mated joints.
Polymerisable Cements
Polymerisable or reactive cements are thicker, syrup-like adhesives. They work differently. Instead of just melting the plastic, they are a mix of solvent and acrylic monomer that fills small gaps between the pieces. A chemical reaction, often initiated by a catalyst or UV light, causes the cement to polymerise and harden, forming a solid acrylic bond. These are useful for joints that aren't perfectly flat or for bonding larger surface areas where a gap-filling property is needed. However, they generally require more skill to apply without bubbles and take longer to cure.
| Feature | Solvent Cement (e.g., Acrifix 116) | Polymerisable Cement |
|---|---|---|
| Viscosity | Very thin (like water) | Thick (like syrup) |
| Application Method | Capillary action with needle applicator | Applied before joining, can fill gaps |
| Best For | Clean, tight edge joints | Irregular joints, large surfaces |
| Cure Time | Fast initial set, 24 to 48 hours for full strength | Slower, requires catalyst or UV light |
Essential Tools and Safety Precautions
Before you begin, gather your tools and prepare your workspace. Safety is paramount when working with chemical solvents.
Tools You'll Need:
- Solvent cement (a watery type like Acrifix 116 is ideal for beginners)
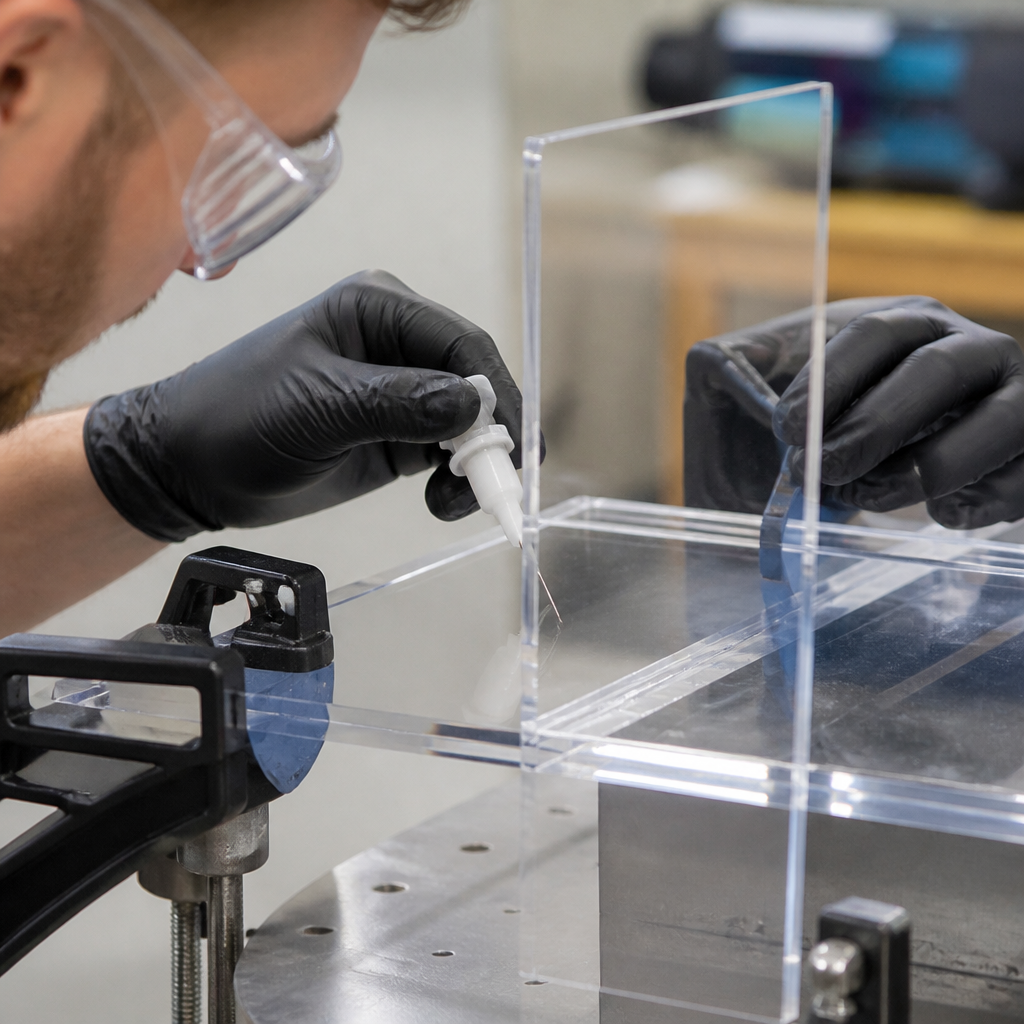
- Applicator bottle with a fine needle tip
- Clamps or jigs to hold pieces steady
- A perfectly flat work surface
- Lint-free cloths
- Isopropyl alcohol for cleaning (use sparingly and ensure it fully evaporates)
Safety First:
- Ventilation: Always work in a well-ventilated area. Open windows and doors, or use a fan to direct fumes away from you. The solvents are volatile and the fumes can be harmful.
- Personal Protective Equipment (PPE): Wear chemical-resistant gloves (nitrile is a good choice) and safety glasses or goggles at all times. Solvents can damage skin and cause serious eye injury.
- Fire Hazard: Solvents are flammable. Keep them away from any open flames, sparks, or sources of ignition.
Step-by-Step Guide to Solvent Welding Acrylic
With your materials and safety gear ready, you can start the bonding process. For this guide, we will focus on the capillary method with a solvent cement.
Step 1: Prepare Your Acrylic Edges
This is the most critical step. For solvent welding to work, the edges of your acrylic must be perfectly flat, smooth, and clean. A rough, saw-cut edge will not create a strong or clear bond. The edges should mate together with no gaps. To achieve this, you can scrape, sand, and polish the edges. However, for the best possible result, professionally prepared edges are recommended. Our precision Laser Cutting and CNC Router Cutting services produce clean, smooth edges that are ready for bonding. If you're starting with a larger sheet, we can provide perfectly square Cut to Size Plastic pieces for your project.
Step 2: Clean and Dry Fit
Wipe the edges to be joined with a lint-free cloth and isopropyl alcohol to remove any oils, dust, or residue. Allow it to evaporate completely before proceeding. Do a “dry fit” by assembling the pieces exactly as you intend to glue them. Use clamps or jigs to hold them securely in place. Ensure there is no movement and the joint is tight along its entire length.
Step 3: Apply the Solvent Cement
Fill your applicator bottle with the solvent cement. Tilt the bottle slightly and gently squeeze to remove air until a small drop of solvent appears at the tip of the needle. Hold the applicator at a slight angle to the joint. Lightly touch the needle to the top of the joint and gently squeeze the bottle as you draw it along the seam in one continuous motion. You will see the solvent instantly wick into the joint through capillary action. Work quickly and deliberately. Do not apply excessive solvent, as it can run onto the face of the acrylic and cause blemishes.
Step 4: Allow the Bond to Cure
The solvent works fast. An initial bond will form within a few minutes. At this point, the piece can be handled gently, but the joint is still very fragile. Do not put any stress on the joint for at least 3 hours. The bond will continue to strengthen over time, reaching approximately 80% strength in 24 hours and full strength in 48 to 72 hours. Avoid cleaning or polishing near the joint during this time.
Common Problems and How to Troubleshoot Them
Even with careful preparation, you might encounter a few issues. Here’s how to avoid them.
- Bubbles in the Joint: This is often caused by gaps between the pieces or applying the solvent too slowly, allowing it to evaporate before it fully penetrates the joint. Ensure your edges are perfectly flat and apply the solvent in a single, smooth pass.
- White Haze or “Crazing”: This network of tiny cracks is usually a result of stress. It can be caused by applying solvent to a bent or tensioned piece of acrylic, or by using improper cleaning agents like alcohol that hasn't fully evaporated. Always ensure pieces are relaxed and properly cleaned before bonding.
- Weak Bond: A weak joint is almost always due to poor edge preparation. If the surfaces aren't perfectly smooth and flat, the solvent cannot create a complete weld. Contamination from dust or fingerprints can also prevent a proper bond.
Professionally Fabricated Solutions
While gluing acrylic at home can be rewarding, some projects require a level of precision and finish that is difficult to achieve without specialised equipment. For complex shapes, load-bearing structures, or products where perfect aesthetics are essential, professional assistance is the best option. Products like our crystal-clear Acrylic Display Cases and sharp Acrylic Letters are made using precise techniques to ensure flawless, bubble-free joints. Our expert Plastic Fabrication services combine advanced machinery and years of experience to create robust and beautiful custom items to your exact specifications.
If your project demands perfection or you're looking for a custom-built solution, don't hesitate to reach out to our team. We can advise on the best materials and construction methods for your needs. For a detailed price on materials or fabrication services, please request a quote and we'll be happy to help.