
7 October 2026
How to Cut Acrylic Sheet Without Cracking: A Guide
Preparation is Key: Before You Make the First Cut
Proper preparation is the most important step in achieving a clean cut. Rushing this stage is where most mistakes happen, leading to cracks, chips, and wasted material. Before you even think about cutting, take a few moments to get your setup right.
Safety First
Acrylic might look like glass, but when it cracks or shatters, the resulting shards are incredibly sharp. Always wear safety goggles to protect your eyes from flying chips. Gloves are also a good idea to protect your hands from both the cutting tool and any sharp edges on the acrylic itself.
Create a Stable Workspace
You need a flat, solid, and stable work surface that won't wobble or move while you're cutting. Any vibration can travel through the sheet and cause it to crack unexpectedly. Ensure the surface is clean and free of any debris that could scratch the acrylic or cause it to sit unevenly.
Leave the Protective Film On
New Acrylic Sheet (Perspex) almost always comes with a thin plastic film on both sides. Leave this film on for as long as possible. It’s your best defence against scratches during handling and cutting. It also provides a perfect surface for marking your cut lines with a non permanent marker or grease pencil, which can be easily wiped away later.
Measure Twice, Cut Once
This old saying is especially true for acrylic. Use a quality measuring tape and a reliable straightedge. Carefully mark your cut lines, then double check your measurements before proceeding. A small measurement error is impossible to fix once the cut is made.
Method 1: Scoring and Snapping (For Thin Acrylic)
For thin acrylic sheets, typically those up to 4.5mm thick, the scoring method is simple, effective, and doesn't require any power tools. The goal isn't to cut all the way through, but to create a precise weak point that allows for a clean, straight break.
Tools You'll Need
- A plastic scoring tool (recommended) or a new, sharp blade in a utility knife.
- A sturdy straightedge, like a metal ruler or a carpenter's square.
- Clamps to hold the straightedge in place.
- A solid workbench or table with a sharp, 90-degree edge.
Step-by-Step Guide
- Secure the Sheet: Place the acrylic sheet on your flat work surface. Align your straightedge with the marked line and clamp it down firmly. This prevents the ruler from slipping and ensures your score is perfectly straight.
- Score the Line: Using firm, consistent pressure, draw the scoring tool along the straightedge to create a groove. Don't try to make the groove too deep on the first pass. It's much more effective to make several passes (around 5 to 10 for a 3mm sheet) to gradually deepen the score line. You should aim for a groove that is about 25% of the way through the material's thickness.
- Position for the Snap: Unclamp the sheet and position it on your workbench so the scored line is facing up and perfectly aligned with the edge of the table.
- Snap the Acrylic: With one hand holding the section of the sheet on the table, use your other hand to apply quick, firm, and even downward pressure to the overhanging section. The acrylic should snap cleanly along the scored line.
If the sheet doesn't snap cleanly, it almost always means the score line wasn't deep enough. Resist the temptation to bend it back and forth, as this will likely cause a jagged break. It's better to return it to the workbench and make a few more passes with the scoring tool.
Method 2: Cutting with Power Saws (For Thicker Acrylic)
When working with acrylic thicker than 4.5mm, a power saw is the right tool for the job. However, you can't just use any old blade. The key to success is managing friction and heat, which are the main culprits behind melting and cracking.
Critical Sawing Principles
- Blade Selection: This is non-negotiable. Use a blade specifically designed for cutting plastics or, alternatively, a blade for non ferrous metals. These blades have a high tooth count and a neutral or negative tooth rake to prevent them from biting too aggressively into the material. A standard wood-cutting blade is too coarse and will chip, melt, or crack the acrylic.
- Heat Management: Friction from the blade generates heat. Too much heat will melt the acrylic, which can then fuse back together behind the blade or cause stress cracks. To avoid this, use a steady, moderate feed rate. Don't force the saw through the material; let the blade do the work. If you're making long cuts, you can pause periodically to let the material and blade cool down.
Using a Jigsaw
A jigsaw is ideal for cutting curves and intricate shapes. Again, use a fine-toothed blade meant for plastics. Ensure the acrylic sheet is clamped down securely to the workbench, with the cut line as close to the edge as possible to minimise vibration. A vibrating sheet is a cracking sheet. Start the saw before it makes contact with the acrylic and guide it smoothly along your line.
Using a Circular Saw or Table Saw
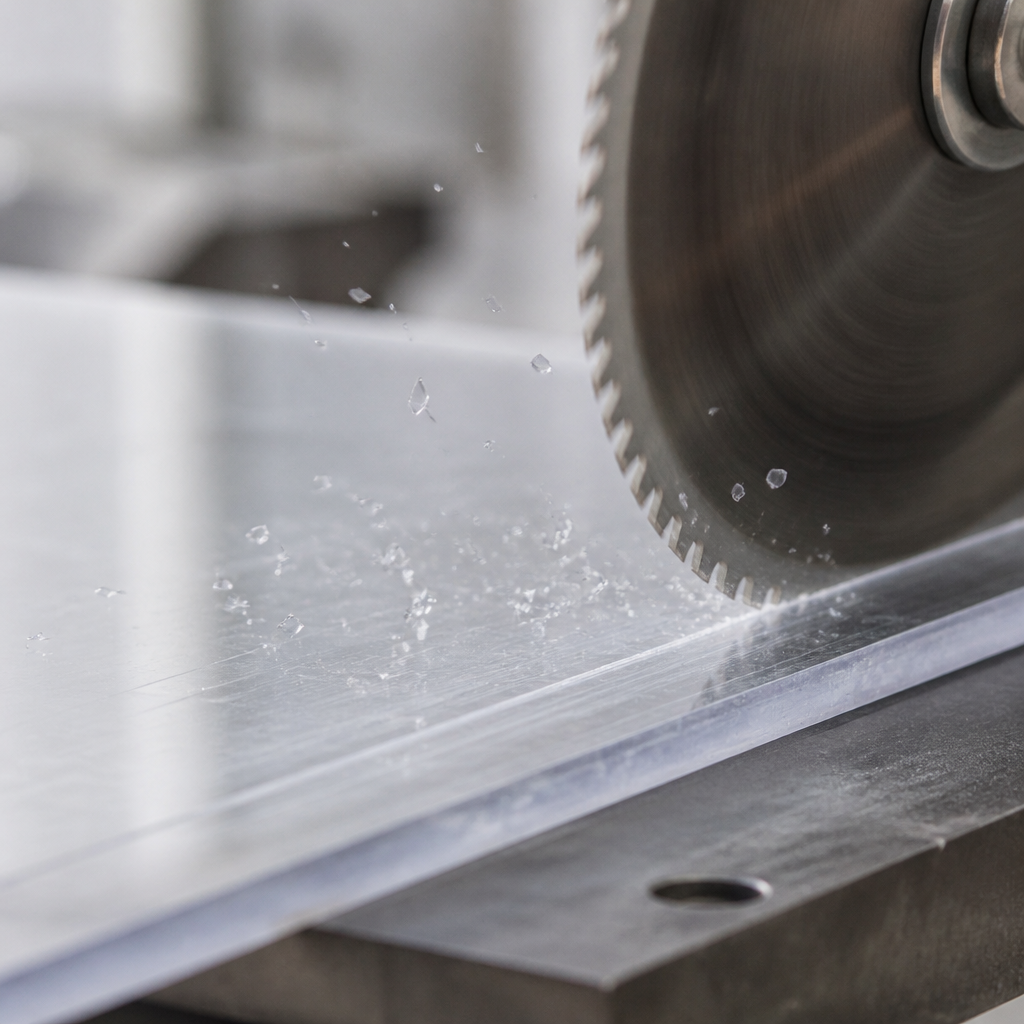
For long, straight cuts in thick material, nothing beats a circular saw or table saw for speed and precision. Set the blade depth so that the teeth just clear the top surface of the acrylic sheet. A blade that is set too high increases the chance of chipping. Use a guide or the saw's fence to ensure a perfectly straight cut. This is the method we often use in our workshop for our Cut to Size Plastic service, as it delivers consistently excellent results.
Comparing Cutting Methods for Acrylic Sheet
Choosing the right approach depends on your material thickness and the type of cut you need. Here's a quick comparison:
| Method | Best For (Thickness) | Pros | Cons |
|---|---|---|---|
| Scoring & Snapping | Up to 4.5mm | No power tools needed, quiet, clean break. | Only for thin sheets and straight lines. |
| Jigsaw | Over 3mm | Excellent for curved and complex shapes. | Can be slow, requires careful control to avoid vibration. |
| Circular / Table Saw | Over 4.5mm | Fast, precise, perfect for straight cuts. | Requires specific blades, generates heat and noise. |
Finishing the Edge for a Professional Look
A saw cut will always leave a machine-marked or matte finish on the edge. For many functional parts, this is perfectly fine. But for projects where appearance matters, like custom Acrylic Display Cases or shelving, finishing the edge is what separates a DIY job from a professional one.
Sanding: Start by removing saw marks with a flat scraper or the back of a utility knife blade. Then, begin sanding. Wrap sandpaper around a wooden block to keep the edge flat and square. Start with a medium grit (like 220), then move to a fine grit (400), and finish with a super-fine grit (600 or higher). Wet sanding (using water as a lubricant) will give an even smoother, frosted finish.
Flame Polishing: This advanced technique involves using a specialised torch to quickly melt the surface of the acrylic edge, resulting in a crystal-clear, glass-like finish. This requires a lot of practice and should be approached with caution, as it's easy to overheat and damage the acrylic. For most people, this is a process best left to the experts in a professional Plastic Fabrication shop.
For the ultimate clean edge with no finishing required, Laser Cutting is the superior choice. A laser cutter vaporises the material, leaving a perfectly smooth and polished edge right from the machine, which is ideal for intricate lettering and detailed designs.
Cutting acrylic sheet at home can be a very satisfying part of a project. By choosing the right method for the material's thickness, using the correct tools, and taking your time, you can achieve crack-free, professional results. But for projects that require guaranteed precision, complex shapes, or a perfectly polished finish, Holland Plastics is here to help. Whether you need simple sheets cut to size or complex Fabricated Parts, we have the technology and expertise to get the job done right. For a precise and professional result every time, request a quote from our Gold Coast team today.